How To Mount A Tactical Flashlight
What Is a Tactical Flashlight Mount?
A tactical flashlight mount is procedure that allows you the shooter to place accessories to their firing gun. In this case, flashlights are attached to help the shooter have a perfect vision of the target, especially the night. In a more specific definition, a tactical mount refers to a platform on which you mount light in a low light situation.
No matter your weapon, you want to know the right way of mounting the flashlight to help you have a perfect view of our target in the night or in low light conditions. You need to have your clamp mount that has rings that are attached to the gun to allow for other accessories to be mounted. Different types of mounts exist–some are both rail and ring while others may come with a design that is completely different.
Remember that the mounting will vary because of different shooting situations or the type of weapon that you wish to use. Here is how to mount a tactical flashlight on a rifle, any rifle from an AR-15 to a 22 air rifle:
If you have rails already built on your gun, you will have pretty simple task of mounting your flashlight on your rifle. Two steps are usually necessary and the choice will depend on the type of weapon.
Step 1:
You need to open the mount and where your gun has a rail or ring, open it to mount the flashlight. You might need to loosen the ring or remove the bolts before mounting the light.
Step 2:
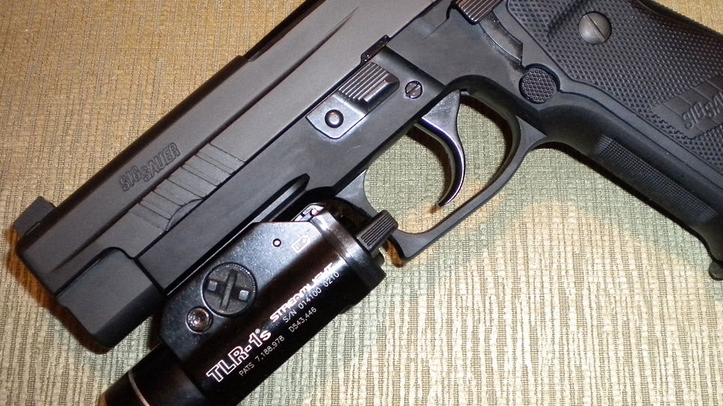
The best tactical lights feature the mounting area (usually at the center of the shaft). Its grip is highly textured that covers the circumference of the shaft. This is the place you will want your rings to hold the flashlight in place.
You need to ensure that the diameter of the flashlight is similar to that of the rings. If your flashlight is bigger then you might damage it. On the other hand, a very small flashlight will be difficult to be held in place. Where the flashlight is too small to fit into the ring you need to wrap a rubber tube into the ring to help prevent movement. Rubber is the preferred material as it absorbs shock and grips the light into the rings.
Step 3:
Close the ring once you have the flashlight in place. Screw the ring into place, ensuring that it is as secure as possible.
Step 4:
Make sure to attach the mounted unit to your track system. You might need to slice together the two mounts before replacing the mounting bolt. Hex-nut bolts are the most appropriate. Different mount brands come with different designs. Some will have a pressure switch. Check the manufacturer’s manual to see how to fix all of the add-ons.
Step 5:
Confirm your work: You want to be sure that everything is perfectly fitted to avoid any mishaps. Ensure that your bolts are even and perfectly tight. The unit should not be loose or able to move. The last thing you want to see is your light move hen firing your gun.
With the above steps on how to mount a tactical flashlight, you will be able ready to go for your target without any challenge.
Here is a video that may help you out as well. Take a look: